IOS TOPICS

IOS Introduction
Swift UI Label
Swift UI Button
Swift UI Text Field
Swift UI Slider
Swift UI Switch
Swift UI Stepper
Swift UI Date Picker
Swift UI Segmented Control
Views
Table View
Collection Views
SCROLL VIEW
iOS Content View
iOS View Controllers
iOS Bar interface
iOS Navigation interface
iOS Architect Pattern
iOS Libraries
iOS Web request and parsing
iOS user defaults
iOS Coredata and database

Creating the TextField


Creating the Simplest Form of a TextField:

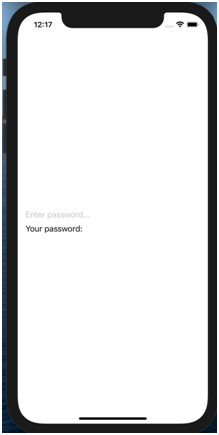
TextField requires a label and a binding value so we need to pass a placeholder string and a binding to the variable @State, which will store the value entered.

import SwiftUI struct ContentView: View { @State var password: String = "" var body: some View { VStack(alignment: .leading) { TextField("Enter password...", text: $password) }.padding() } }

Here “password” is the variable that stores the value entered.

Creating the Simplest Form of a TextField: Using the two closures - onEditingChanged and onCommit callbacks

The onEditingChanged property informs your app when the user begins or ends editing the text. The onCommit property executes when the user commits their edits and taps return.

Code:

struct ContentView: View { @State var password: String = "" var body: some View { VStack(alignment: .leading) { TextField("Enter password...", text: $password, onEditingChanged: { (changed) in print("Password onEditingChanged - \(changed)") }) { print("Password onCommit") } Text("Your password: \(password)") }.padding() } }

Output:

On running this code, we can see that entering our password actually stores it in the variable “password” that is being displayed in the next line.

ios output